Way back in 1827, the Baltimore and Ohio Railway was started from the harbor in Baltimore with a plan to run across the Appalachian Mountains to the Ohio river and make Baltimore a major hub for transportation. By 1878 the railway was up and running after some stupendous constructions to get over the mountains of West Virginia and run alongside the rivers in that area to reach its destination.
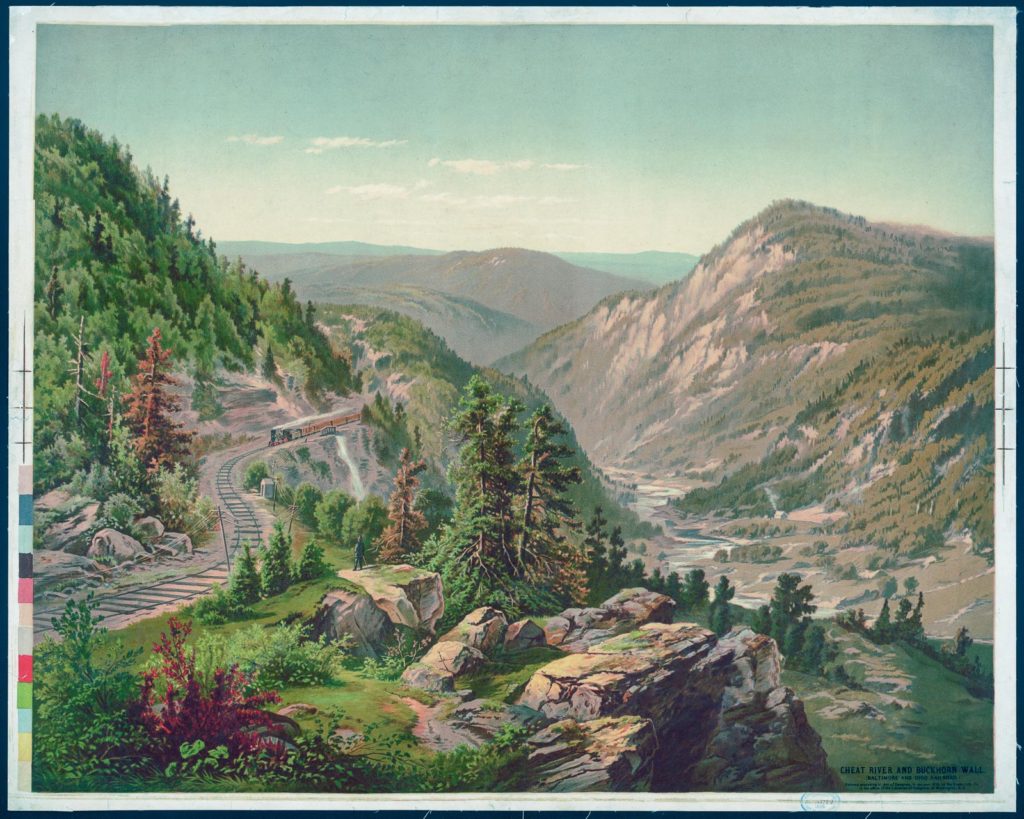
One of those areas was near Rowlesburg in West Virginia where the track, after a 17 mile grade along the Cheat River, reached the height of over 3000 feet and was held on the mountainside by a large constructed wall, known as the Buckhorn Wall. An artist in 1878 was commissioned to paint the railway on this wall alongside the river and this was entered into the Library of Congress as a chromolithograph approximately four feet by 3 feet (122cm x 92cm). The LoC has digitized a lot of those early documents and prints and these are now freely available for download. Unfortunately, this one isn’t in great condition, and so I decided to set about restoring it. Just why I decided to do that is a bit vague – it seemed like it would be an interesting print to frame and represents a great piece of West Virginia history, but the effort was quite a bit more than I expected. Here is the image as stored in the Library of Congress:
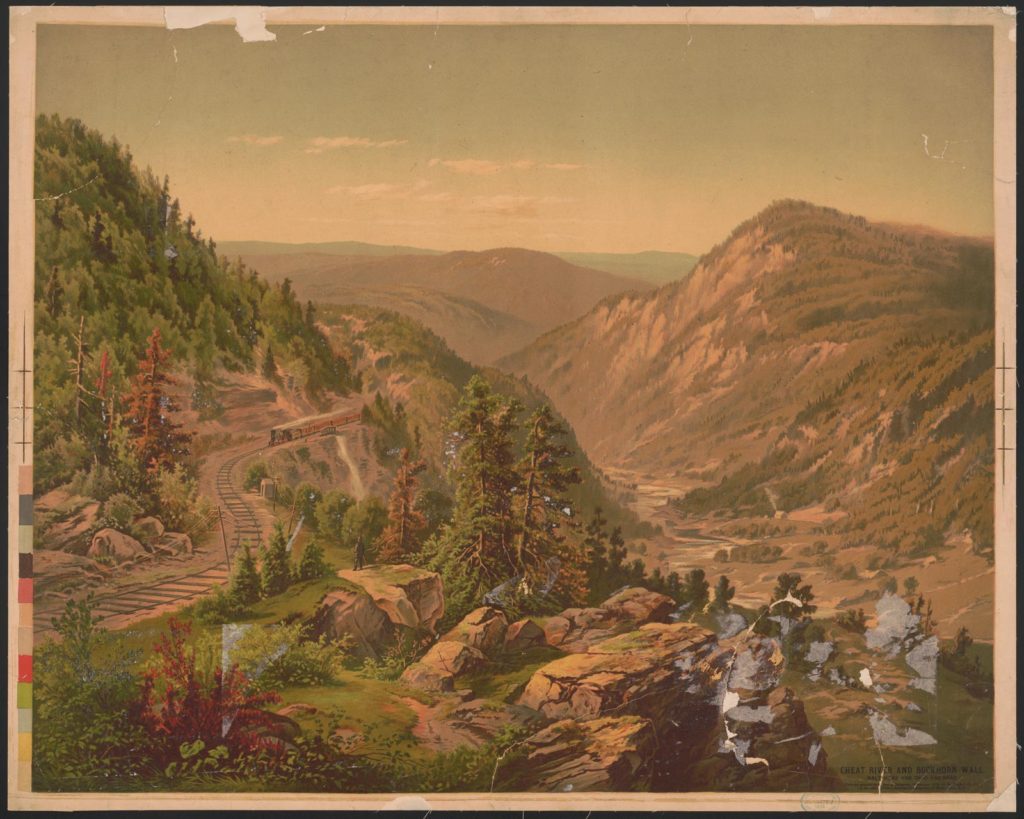
For the technically minded, the scan of the original is a digital file 9622 pixels wide – almost four times as big as you would get with a typical digital camera and so there is tons of detail there. The trouble is, there is tons of damage visible in those details. The bottom right has some severe damage:
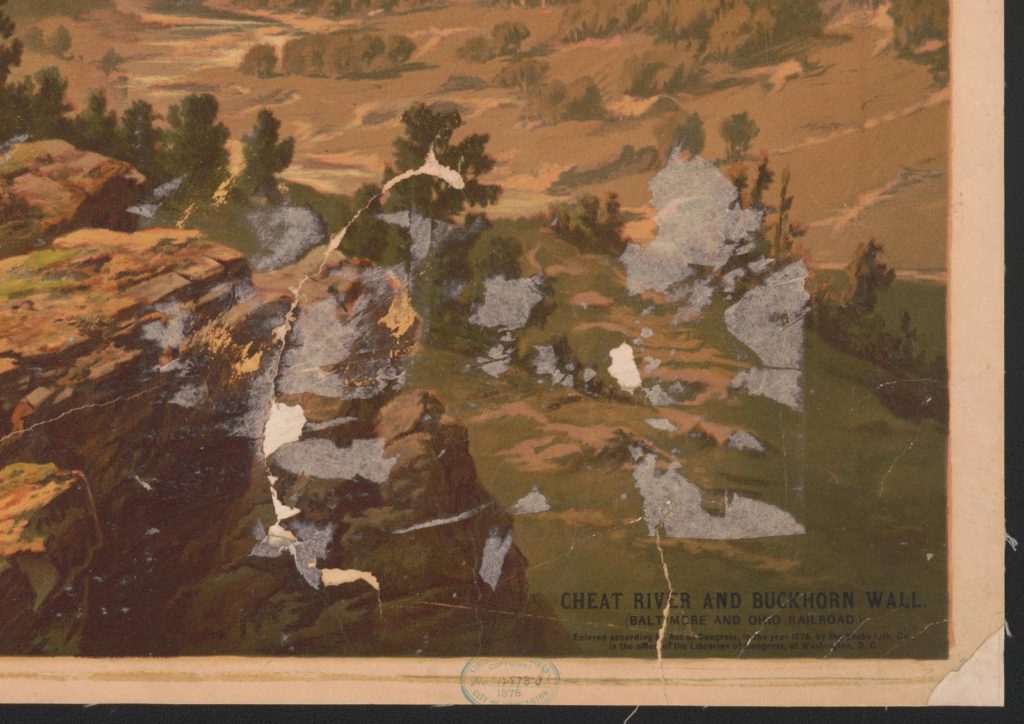
Here we have missing detail as well as rips and surface damage and it appears that something stuck to the surface of the print in the past.
In the bottom left, the damage is not as bad, but the details of the trees is covered with small bluish marks:
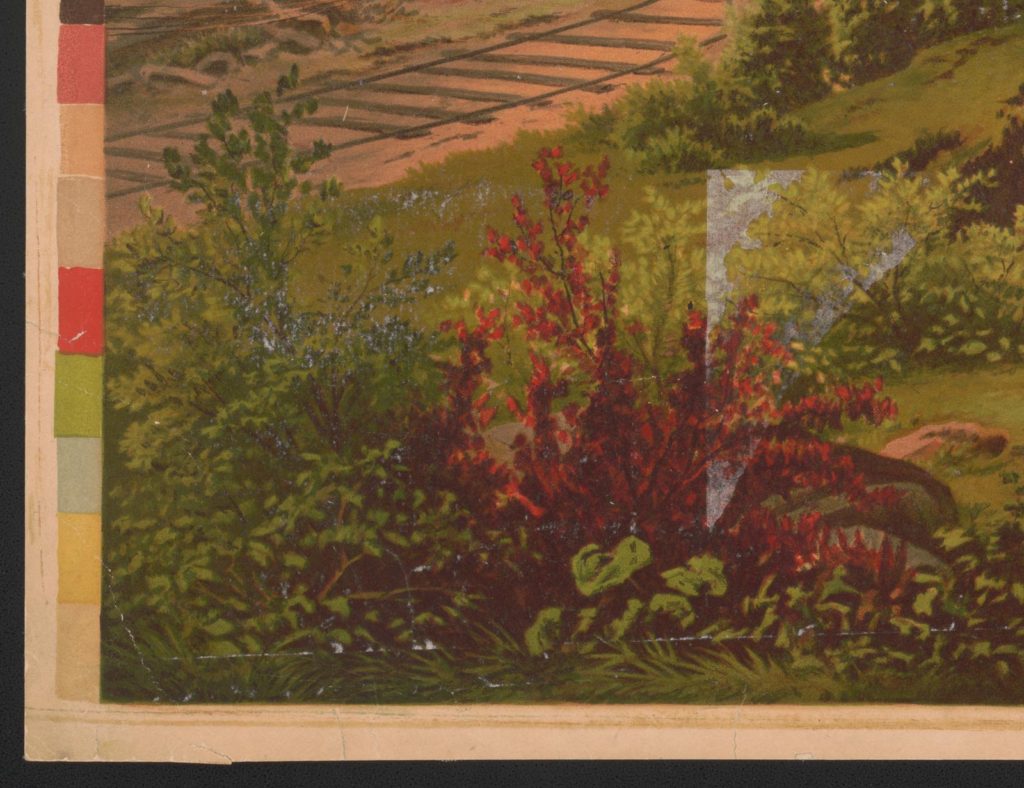
But, I thought this was fixable! First thing was to try to correct the color. I assumed that the very edge of the paper (originally) would have been white and so I used that to try to get back to something that the artist would have recognized. Lightroom is pretty good at this sort of thing and so I made the first corrections there to get the correct white balance and also bring back some of the contrast into the image:
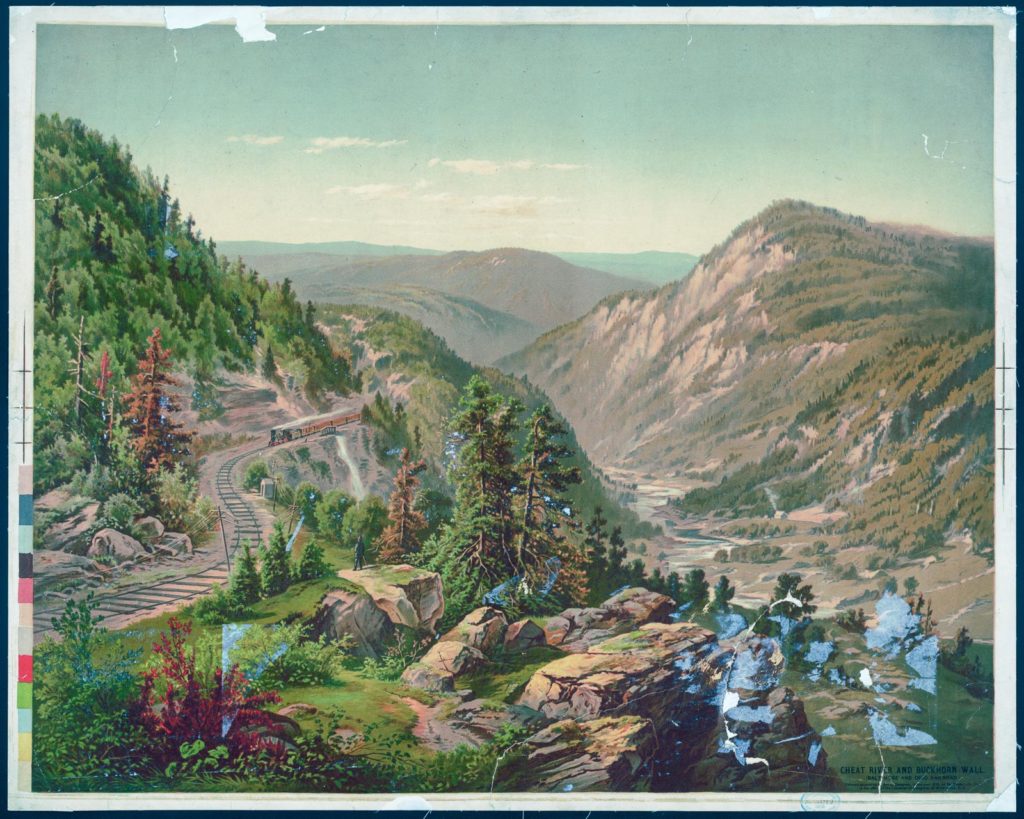
Now to work on those missing elements. This is where the hours went by. I flipped about from area to area so that I wasn’t tempted to overdo the copying in any one area and so I used a combination of Content Aware fill and straight forward cloning to try to rebuild that rock face and fix the missing areas in the flood plain of the river. Many, many small changes started to rebuild that cliff. After doing that, I noticed that many areas had the remnants of that bluish adhesive that had been stuck on the painting at some point. Getting rid of all those while keeping the detail would be a massive undertaking using those basic tools. So I thought I could use the “Select Color” function to make a selection of all the areas that had that lightish blue tone. With this I could create a mask that would allow me to paint colors back into those areas, but only on the area that is blue. That made a big difference as I could select the appropriate color for an area, paint with a small brush, but only affect the areas with missing color. Of course, lots of color changes along the way, but it worked.
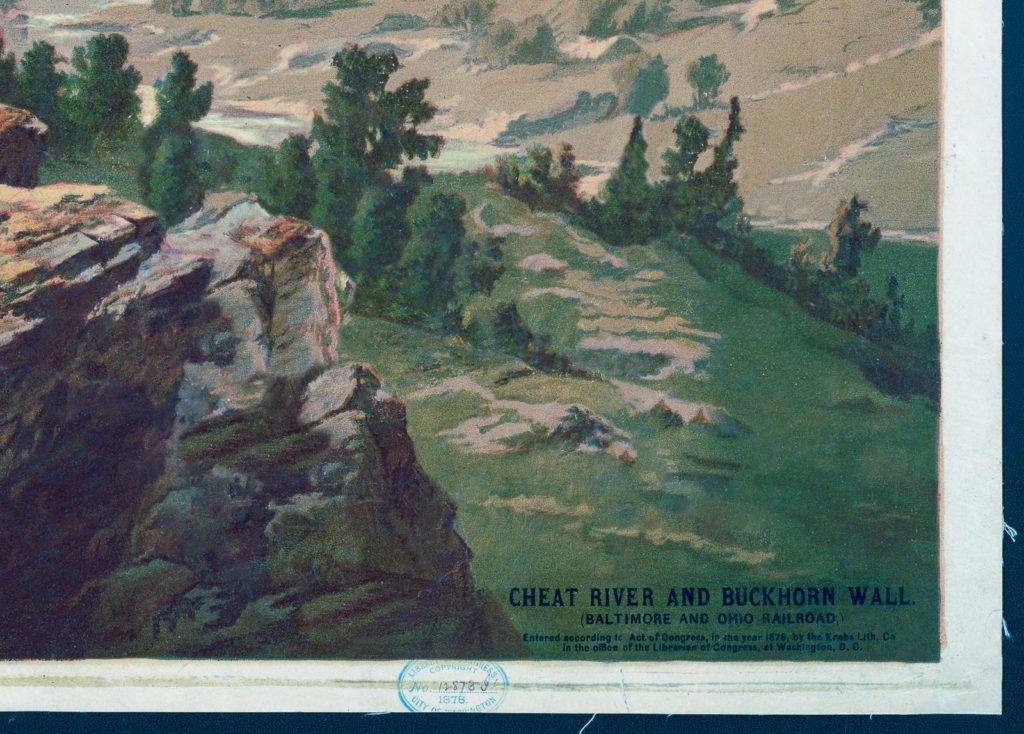
Then it was just a matter of putting the hours in to fill all those small areas with a realistic new color! Here is the corner with the missing cliff:
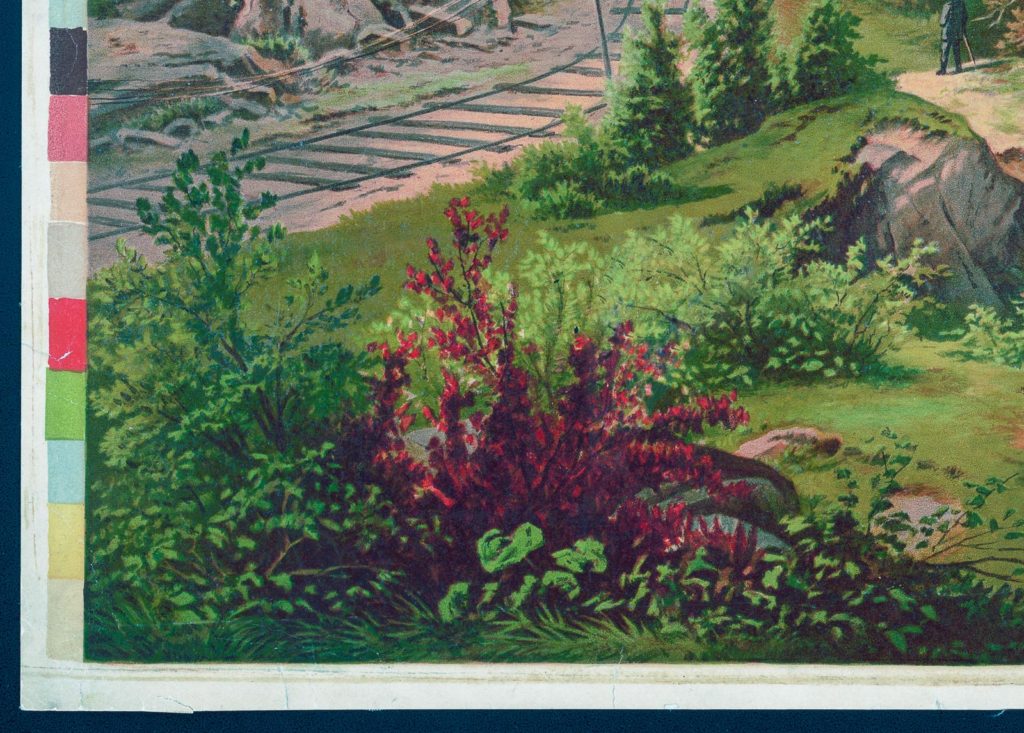
And that tricky area around the leaves of the bushes:
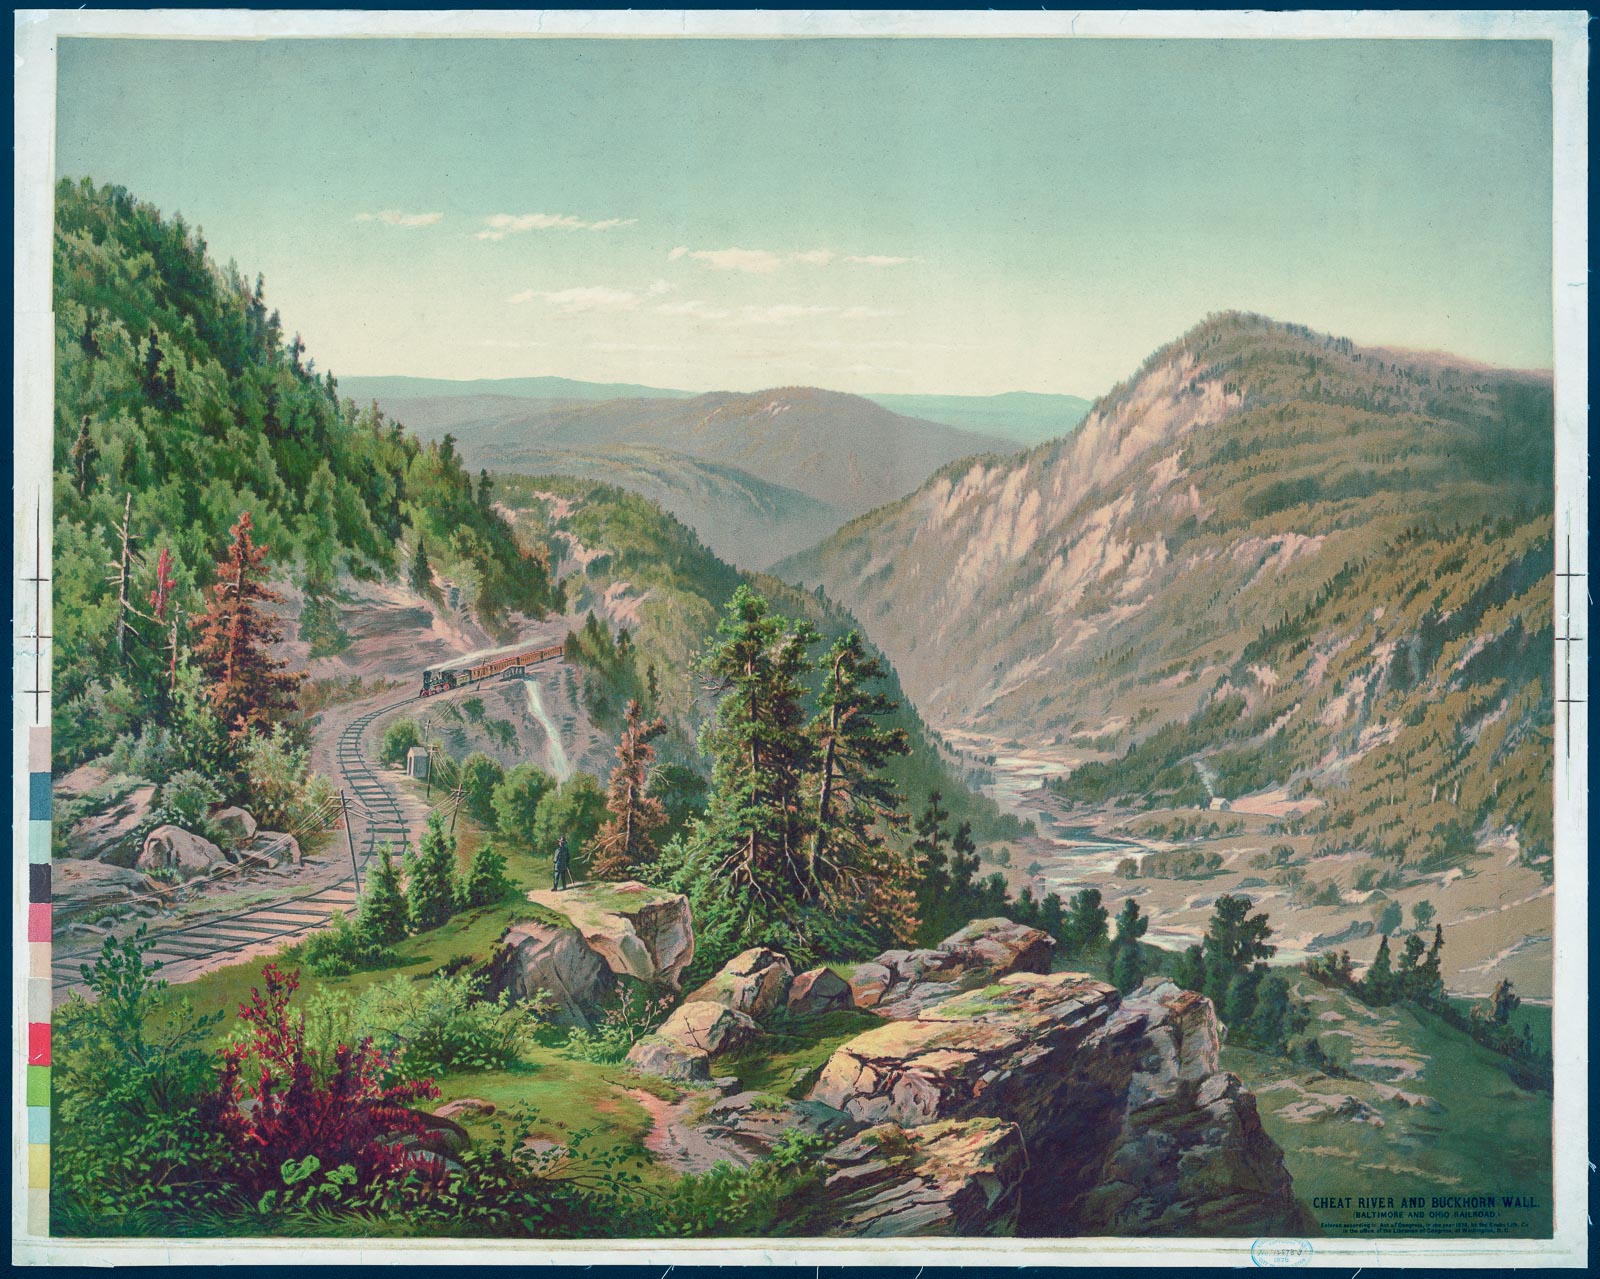
And, finally, the completed painting, ready for printing for your wall! You can find the print on my website, SteveHeap.com ready for printing on Metal, Acrylic, Canvas or as a framed print.

Pingback: Enhancing maps from the Library of Congress – Backyard Image